
Dog Grooming at Home Step-by-Step Guide
- 1. Assembling Your At-Home Dog Grooming Kit
- 2. Preparing Your Space and Managing Anxiety
- 3. Step 1: Pre-Bathing Coat Preparation and De-Matting
- 4. Step 2: Bathing and Conditioning Like a Pro
- 5. Step 3: Drying and Moisture Control
- 6. Step 4: Trimming Nails and Cleaning Paws Safely
- 7. Step 5: Ear and Eye Maintenance
- 8. Step 6: Clipper Techniques and Haircut Basics
- 9. Step 7: Scissors Touch-Ups and Post-Grooming Rewards
- Frequently Asked Questions (PAA)
- Conclusion
Dog Grooming at Home: Step-by-Step Guide for First-Timers
Professional pet grooming costs between $50 and $150 per session. Multiply that across twelve months, and you are spending thousands of dollars annually on basic maintenance. Beyond the cost, taking a nervous dog to a crowded commercial salon creates unnecessary stress for both you and your pet. Learning how to manage dog grooming at home eliminates these recurring fees while giving you total control over your pet’s safety and comfort. However, diving in without a structured technique often results in jagged coats, accidental skin nicks, or a terrified dog hiding under the sofa.
In this beginner-focused masterclass, we will walk you through the entire process from prep work to final touch-ups. You'll learn how to choose the right gear, desensitize your pet to loud noises, safely trim nails, wash sensitive skin, and execute clean clipper work without panic. To build a solid foundation in overall pet care, learn more about how to train a dog in 5 simple steps before introducing complex physical handling routines.
1. Assembling Your At-Home Dog Grooming Kit
You cannot achieve professional results with makeshift household items. Human hair clippers lack the torque needed to cut through dense canine fur, and human scissors pose a severe puncture risk. Investing in dedicated grooming equipment ensures clean cuts and protects your dog's skin from thermal burns or accidental nicks.
Essential Tools for Beginners
Before bringing your dog to the grooming area, gather these fundamental tools:
- Slicker Brush & Metal Comb: A slicker brush removes loose undercoat, while a stainless steel greyhound comb detects hidden mats.
- Professional Pet Clippers: Choose a quiet, cordless unit with removable guard combs (sizes 3, 4, 7, and 10 are ideal for home users).
- Safety-Tip Scissors: Straight shears for coat length and rounded-tip ball-point scissors for delicate areas around eyes and paws.
- pH-Balanced Dog Shampoo: Formulated specifically for canine skin, which sits at a neutral 6.5 to 7.5 pH level.
- Nail Clippers with Safety Guard: Heavy-duty pliers-style clippers or a rotary nail grinder (Dremel).
- Styptic Powder: An essential blood-clotting agent used to stop bleeding immediately if you accidentally nick the quick.
Grooming Tool Comparison Table
| Tool Type | Primary Function | Best Coat Types | Beginner Safety Level |
|---|---|---|---|
| Slicker Brush | Deshedding, removing fine tangles | Double coats, curly, long hair | Very High |
| Undercoat Rake | Removing trapped undercoat fur | Heavy shedding breeds (Huskies, Shepherds) | High |
| Cordless Clippers | Even body hair trimming | Continuous growing coats (Poodles, Doodles) | Medium (Requires guard combs) |
| Rotary Nail Grinder | Smoothing and shortening nails | All breeds and nail colors | High (Safer than manual clippers) |
2. Preparing Your Space and Managing Anxiety
Environment dictates behavior. Trying to groom your dog on a slippery tile floor or an unstable coffee table triggers anxiety, causing the dog to shift constantly. Professional groomers use elevated tables with non-slip rubber mats to secure animals at working height.
Setting Up a Safe Grooming Station
Choose an enclosed space with bright lighting and minimal distractions, such as a utility room or bathroom. Place a heavy rubber bath mat on your table or inside the tub to provide firm traction. Keep all tools within arm's reach before fetching your pet. If your dog gets agitated around new environments, check out apartment-friendly dog breeds for tips on managing pet activities in confined living spaces.
Desensitization Techniques
Noise phobia is the primary reason dogs resist grooming. Introduce clippers and dryers gradually using low-stress conditioning:
- Turn on the clippers across the room while feeding your dog high-value treats.
- Touch the back of the vibrating clipper handle (not the blade) against your dog's shoulder to acclimate them to vibrations.
- Keep initial training sessions under five minutes, ending on a positive note.
3. Step 1: Pre-Bathing Coat Preparation and De-Matting
Never bathe a matted dog. Water acts like a sponge on tangled fur, causing matting to tighten against the skin like felt. Once wet mats dry, removing them without shaving the skin becomes nearly impossible.
The Proper Brushing Technique
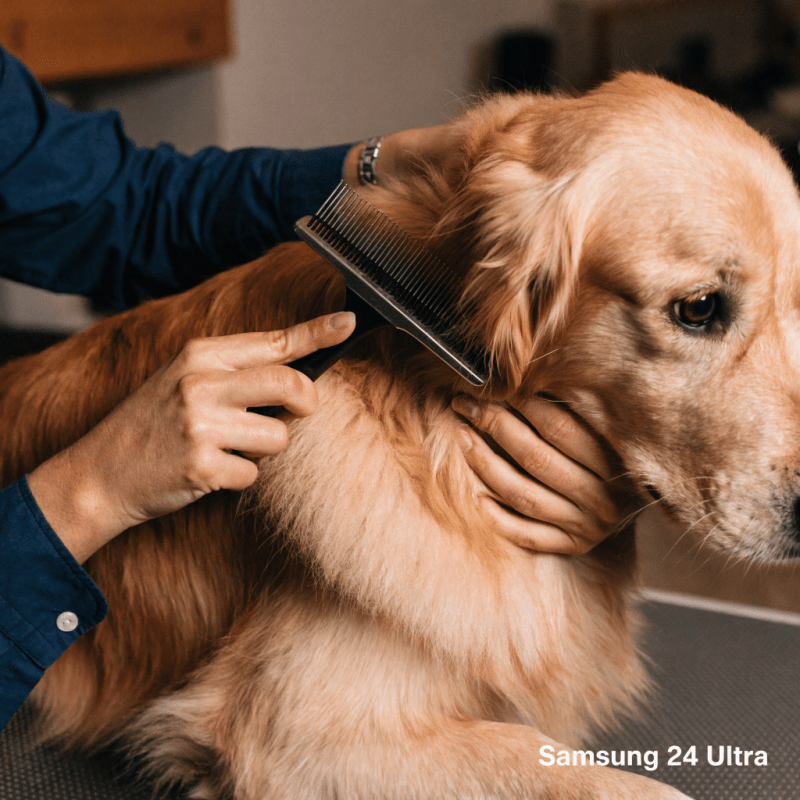
Divide your dog’s body into logical zones: legs, chest, belly, back, and tail. Work in small sections using the line-brushing method. Fold the fur upward with one hand and brush small layers downward from root to tip. Once the slicker brush moves smoothly, run your metal comb through the section to verify that no hidden knots remain.
Handling Severe Mats Safely
If your comb catches on a stubborn knot, hold the base of the hair near the skin with your thumb and forefinger to prevent pulling. Carefully work the outer edges of the mat with your slicker brush. Never insert scissors directly into a mat; skin can easily pull up into the knot, leading to severe lacerations. If a mat sits flush against the skin, shave it out using a #10 clipper blade.
4. Step 2: Bathing and Conditioning Like a Pro
Bathing removes dirt, excess oils, and loose hair, but over-bathing strips natural lipid barriers, causing dry, itchy skin. Selecting the appropriate products and mastering rinsing techniques prevents post-bath irritation.
Water Temperature and Product Selection
Adjust your water supply to lukewarm. Dogs possess higher core body temperatures than humans, making hot water extremely uncomfortable. Wet the dog thoroughly from the neck down, keeping water out of the ear canals. Apply a dedicated canine shampoo diluted with water in a squeeze bottle—diluted product spreads evenly and rinses out far faster than concentrated soap.
For dogs prone to skin sensitivity or allergies, proper topical care is vital. According to veterinary dermatological studies published in peer-reviewed journals (Veterinary Dermatology Journal Research), preserving the epidermal lipid barrier requires mild, non-soap formulations. If your pet suffers from chronic scratching or skin redness, for a deeper dive into skin care, see dog allergies signs, causes, and natural relief remedies.
Rinsing and Ear Protection
Place cotton balls loosely inside your dog's ears prior to bathing to block stray water droplets. Trapped water in the ear canal creates an ideal breeding ground for yeast and bacterial infections. Rinse shampoo out thoroughly until the water runs completely clear. Soap residue left on the skin causes intense itching, flaking, and hot spots.
5. Step 3: Drying and Moisture Control
Drying is not merely an aesthetic step; leaving dense undercoats damp breeds hot spots and fungal skin infections. Moisture trapped in skin folds generates unpleasant odors within hours.
Towel Drying vs. High-Velocity Dryers
Begin by squeezing excess water from the legs and ears using a microfiber towel. Avoid vigorous rubbing on long coats, as this tangles clean fur. High-velocity pet dryers blow water off the skin using air pressure rather than intense heat, dramatically reducing drying time.
Drying Rules by Coat Type
- Short/Smooth Coats: Towel dry thoroughly, then air-dry in a warm room.
- Double Coats (Huskies, Retrievers): Use a high-velocity dryer to blast out trapped undercoat hair.
- Curly/Non-Shedding Coats (Poodles, Bishons): Blow-dry while brushing simultaneously with a slicker brush to straighten curls for an even haircut.
6. Step 4: Trimming Nails and Cleaning Paws Safely
Nail trimming causes significant stress for pet owners due to fear of hitting the "quick"—the internal blood vessel and nerve running through each nail. Regular nail maintenance keeps paws healthy and prevents structural skeletal strain.
Locating the Quick
On clear or white nails, the quick appears as a pink triangle inside the nail center. Trim small slices at a 45-degree angle until you see a solid white circle with a dark center dot. On black nails, the quick is invisible from the exterior. Trim millimeter-thick slices off the tip. Stop immediately when you observe a greyish-black oval fleshy center on the cut surface.
Emergency Quick Care
If you hit the quick, do not panic. Your dog will react to your tone. Dip the bleeding nail directly into styptic powder and apply firm pressure for 15 to 30 seconds. Keep your dog still until the bleeding ceases completely.
For additional reading on paw hygiene and routine washing intervals, looking for inspiration? Try reading how often should you bathe your dog a complete guide by breed.
7. Step 5: Ear and Eye Maintenance
Eye and ear care requires gentle handling and precise product application. Regular maintenance prevents tear staining, wax buildup, and painful canal infections.
Cleaning Canine Ears
Squeeze a veterinarian-approved ear cleaning solution into the ear canal. Massage the base of the ear for 30 seconds; you should hear a squelching sound as the liquid dissolves wax. Allow your dog to shake its head, then wipe away loosened debris from the outer ear flap using a clean cotton pad. Never insert Q-tips deep into the ear canal, as this packs debris against the eardrum.
Managing Eye Discharge
Soft crusts accumulate at the inner corners of the eyes. Moisten a soft cloth with warm water or dedicated eye wash solution and hold it against the crust for 10 seconds to soften it before wiping. Use separate cloth surfaces for each eye to prevent cross-contaminating potential infections.
8. Step 6: Clipper Techniques and Haircut Basics
Executing a clean, even haircut at home requires patience, the correct blade guards, and steady hand motions. Clipper blades heat up rapidly during use; always check blade temperature against the inside of your wrist every five minutes.
Mastering Clipper Direction
Always clip in the direction of hair growth (with the grain) for a smooth, natural finish. Clipping against the grain cuts hair significantly shorter than the chosen guard comb length and often causes razor burn. Hold the clipper blade flat against the body without digging the edges into the skin.
Step-by-Step Body Clipping Protocol
- Neck and Back: Start behind the ears, moving smoothly down the spine to the tail base.
- Sides and Ribcage: Sweep downward from the backline down toward the belly.
- Chest and Throat: Tilt the dog's head up, running clippers down from chin to chest.
- Sanitary Areas: Use a #10 blade with extreme caution around the armpits, groin, and under the tail. Keep skin pulled taut to avoid snagging loose folds.
Reinforcing good behavior throughout grooming is critical. If your dog exhibits stress barks during clipper work, check out stop dog barking 7 proven techniques that actually work to keep noise levels manageable.
9. Step 7: Scissors Touch-Ups and Post-Grooming Rewards
Scissors provide the final polish to your haircut. Use safety ball-tip shears around delicate areas like the face, paws, and hocks.
Scissoring Paws and Face
Lift the paw and comb all fur downward between the pads. Trim excess hair flush with the paw pads to increase traction on smooth floors. On the upper paw, brush fur upward and scissor a neat, rounded circle around the toes. Around the eyes, hold the snout firmly and point scissor tips away from the eyeball while trimming visor hair.
Concluding with Positive Reinforcement
End every grooming session with enthusiastic praise, play, or high-value treats. Even if the haircut looks slightly uneven on your first attempt, creating a positive psychological association ensures your dog stands calmly for future sessions.
Frequently Asked Questions (PAA)
How often should I groom my dog at home?
Grooming frequency depends on your dog's coat type, lifestyle, and breed. Short-coated breeds need brushing once a week and baths every 6 to 8 weeks. Long-coated, double-coated, or curly breeds require daily to tri-weekly brushing and full grooming sessions (including haircut and nail trims) every 4 to 6 weeks to prevent severe matting.
What basic tools do I need for DIY dog grooming?
At a minimum, beginners need a slicker brush, a stainless steel comb, pH-balanced dog shampoo, microfiber towels, pliers-style nail clippers, styptic powder, and rounded-tip safety shears. If you intend to cut long hair, add a quiet cordless clipper set with plastic attachment guards.
How do I keep my dog calm during at-home grooming?
Keep sessions short, incorporate high-value treats (like peanut butter spread on a lick mat), and maintain a calm tone. Desensitize your dog to tool noises gradually over several days before attempting a full groom. Never force a severely panicked dog; take breaks whenever stress levels spike.
Is it safe to cut my dog’s nails at home?
Yes, nail trimming is completely safe at home if you take small, gradual cuts instead of taking off large sections. Learn to identify the quick (the live blood vessel inside the nail) and keep styptic powder on hand to stop minor bleeding instantly if an accidental nick occurs.
Can I use human shampoo on my dog?
No. Human skin has an acidic pH (around 5.5), whereas canine skin is neutral to alkaline (6.5 to 7.5). Using human shampoo strips your dog's protective skin acid mantle, leading to severe dryness, scaling, bacterial infections, and intense irritation.
How do I avoid cutting my dog’s skin with clippers?
Always use clip-on plastic guard combs over your blade, keep the metal blade flat against the body, and never dig the blade edges into loose skin folds. Keep skin pulled taut around armpits, tucks, and ears, and check blade temperature frequently to prevent thermal contact burns.
Conclusion
Mastering dog grooming at home is a practical skill that pays massive dividends in health, savings, and bond quality. By gathering professional-grade tools, setting up an elevated, non-slip workstation, and moving through brushing, bathing, trimming, and nail care methodically, you eliminate the stress of salon visits. Remember that perfection comes with practice; your first attempt is about safety and positive association rather than show-quality aesthetics. Stay patient, reward your dog frequently, and maintain a consistent schedule.
For more insights into overall canine wellness and nutrition maintenance, for more insights, explore best dog food for sensitive stomachs.